RSS

Tag Archives: Backing

Green Tote III

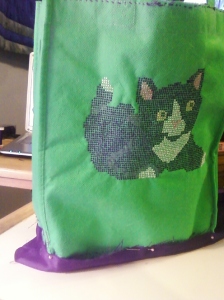
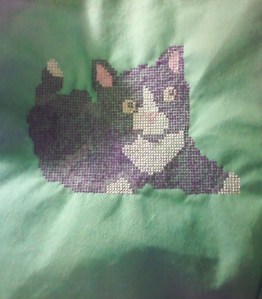
Hi everyone i just wanted to share the final leg of this project with you all. I completed the cross stitching of the kitten and then moved on to lining the inside of the bag. I chose some very shiny fun material for the lining, however it was a little tricky to work with, as it easily unraveled. here are some photos of the progress:

Finished Kitten motif:

Below You can see that once the kitten was finished I started the inside lining of the tote by turning it completely inside out and pinning the bottom piece on first. (you can also see Remington on watch at the window while I sew. He is a good patient dog, even if my sewing days must be so boring for him!)

You can see the white piece of fabric ( which actually came from an old sheet) that I used to help keep the wrinkles at bay while cross stitching the kitten. It also served to keep the green felt of the tote brighter, since I was using a dark color to line the inside.) I had to use a cereal box inside the bag to help me keep the tote’s shape while I stitched the lining on.

And then once the bottom was secure, I used one long piece in a “wrap around” style to line the rest of the tote. This meant that only one vertical seem would be visible inside the tote. Once I had the long piece sewed into it’s  “wrapping” shape ( like a pillow case with both ends open)  i over lapped this piece onto the bottom piece and then sewed it on to the lower piece, making sure the top of the tote and the top of the lining were even.

Once the wrap around piece was attached at the bottom  I then sewed it to the top edge of the tote, all around with small stitches. I used the same black Sulky thread for this that i used for the black coat on the kitten Motif.

The inside of the tote finished; Its really black, not purple. lol!

Once the inside lining was secure, It was time to turn the bag right side out again and work on covering up all the stitching that held the inside lining in place. Below is a picture of the black stitching lines along the top lip of the bag and about an inch up from the bottom of the bag. Much of the rest of the bag’s construction from now on  is about covering up stitching and making the tote look decorated.

As with the inside lining, on the outside I started with the bottom piece. I was careful to make sure my corners and my stitching was very neat, since this would be in a sense a visible lining.

Here you can see I was careful to do the corners tight and I used lots of pins! Again the cereal box came in handy to help me make this extra layer keep the right shape. I used one piece for this-  like wrapping up a Christmas present. once I had the pins in the corners I did some small “tack down” stitches just to take the place of the pins, so I was able to take both the pins and the cereal box away and begin the hard work of sewing with one hand inside the bag and one outside.

Besides covering up stitches, this piece would serve as a protectant against the surfaces on which this bag would be left on, as it was being used. Totes are just one of those bags that end up on the floor at your feet more then anywhere else! Once I had the bottom piece where I wanted it, I still needed to jazz it up a little to cover for the fact that the bottom piece did not seem to look like it belonged. So I used ribbon!

I found a nice satin pink Ribbon which nicely matched the pink of the kitten’s ears and nose. On top of that I glued a black satin ribbon with the words ” Got Fish?” and fishes on it. The words on the black ribbon were also pink and I thought it was very cute and went well with the our original Kitten motif. I decided to stay with the black thread for stitching as it offered a nice contrast on top of the pink ribbon.

Once the ribbon was secure, the bag was beginning to come into it’s own. The request for this tote included a name to be added to personalize it. I had decided that the name ought to be at the top center of the front of the tote already, and since that was also an area that needed a cover for the lining stitches, it was not hard to put the two together and come up with a nice strip of black along the top of the bag. This piece also helps to strengthen the handles which are only attached to the inside of the green front and back pieces of the tote. I decided to use some blanket binding for this strip of “cover up”, and I chose to cross stitch the name on to black Aida 14 Count Cross stitch cloth.

Then once the strip was finished, it was time to attach it! The last part to this project!

It took me 15 hours to complete all of the things mentioned in this blog entry. It took about that many hours before that to stitch the kitten alone, to compare.

Below is the finished Tote!
 
1 Comment

Posted by on November 11, 2012 in Uncategorized


Tags: , , , , , , , , , , , , , , , , , , , , , , , , , , , ,

Aside

Good morning all my fellow Stitchers! I hope this fine October day finds you all well! I love this time of year for many reasons, but one of the best parts is how the chill in the air gives me the excuse to curl up on my couch with a blanket, a movie, and a cross-stitch project.

Lately I have received, through word of mouth, two commissions. It has been very exciting to talk with others, and plan out new projects. Also while all that has been going on, i have begun the C.P.S.F., better known as Christmas Present Stitching Frenzy. Oh yes, folks, it has already started!

I want to share with you the current Christmas ideas I have this year. I was looking at things in a local Dollar store, and discovered some brightly colored tote bags. At first I dismissed them, thinking any motif I wanted to put on them, would have to be done on Aida Cross-stitch cloth, and then sewn on to the outside of the bag which would not be as pleasing to the eye, and a lot of work too. But As I studied them I realized the material they were made of,( a thin felt type of cloth) has, in a way, squares marked off, so I could stitch directly to the tote, without using waste canvas or any other helper!

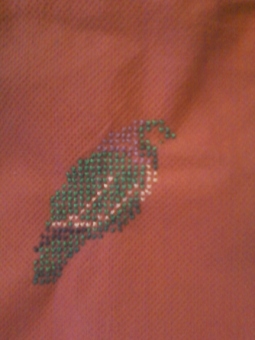
So the experimenting began. My first tote I stitched, was bright pink, and I have to say that it was almost too bright- and became uncomfortable after an hour or two of intense stitching. So I had to put it down a lot and work on other projects on my “time outs”  and the stitching did produce a little bit of wrinkling on the tote’s front surface. I started out using embroidery floss, but soon discovered it did not stand out very well. When I switched over to Sulky thread, I found the “pop” I wanted it to have. Here is a photo of the pink tote’s motif, when almost Finished. You can see how the “holes” in the fabric are really not complete holes, but I use them as guidelines, for where to center each stitch so they are evenly spaced. You can also see how each stitch is farther apart than in traditional cross stitch. The base color of the tote shows through between each stitch. I kind of like this different look. Do you?

Image

As you can see, the motif is not even finished and already wrinkles are starting to form.

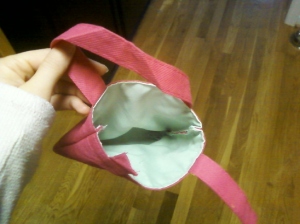
Since this was a practice tote, and not a gift for giving out, I decided to line the inside as well, and see how that went. I chose to use an old pillowcase I don’t use anymore for the lining since it matched well enough, and the material was soft. I simply cut a length of cloth 4 times the length of the front side of the tote ( this is a 5×5 inch tote) and 5.5 inches wide. Then I folded it in half once (the long way) so that the lining would be thick enough to both hide my back stitches, and strong enough to be durable. I turned the tote inside out, and sewed the lining into the seems along the sides, making a kind of sandwich of the tote, with the lining acting as the “wrap” I made sure that the top of the lining which would be attached to the top of the tote, was hemmed as well, so that it looked nice. I had to use pins to keep the lining and the tote both straight, and therefore my stitching straight!


Then when I was finished with the sides, instead of sewing the top of the lining to the top insides of the tote, I used fabric glue to attach it. That way there was no wrinkles, or thread to tie off at the top.

Here is a photo of the lining, after it was finished. ( I accidentally cut one of the handles, but that’s OK- it was a practice one after all!

Finished product, although wrinkly it turned out better than I thought. There for, was born the idea to do totes this year for Presents.


My next tote I chose was a yellow medium-sized tote which was an 8×8 inch tote. I chose yellow to save my eyes for a bit, and I wanted to see how the larger sized motif would work on these totes. And remember  I still had the wrinkle issue to work through. I began stitching, and soon discovered that the back stitches of dark or bright thread would show through the thin felt on a light-colored tote. So that would limit my choices of which colors to stitch with, and even then it would not look as nice as on a darker tote. Well I don’t do well with any type of blockade to my stitching!  So I thought of one way that would solve the thread showing through, and hopefully help, if not solve the wrinkles. I took an old white sheet, ( with a good thread count) and cut a piece out which was the size of the front of the 8×8 tote. Then I turned the tote inside out and pinned the sheet piece to the tote’s front on the inside, so that my stitches would go through both fabrics, and my back stitches would be behind the sheet on the inside. I think it helped both issues. Here is a photo:

You can see there is still a little bit of wrinkling but not nearly as bad as on the pink tote. I think if I had doubled the thickness of the sheet, or used a denser fabric in place of the sheet, I might have been able to smooth out the wrinkles even more.

So friends, I have begun to make totes in earnest. I will post soon the prices/ types of totes I am setting up to do by commission. I hope to improve more and more, every one I make.

And it begins… the CPSF!

 
Leave a comment

Posted by on October 16, 2012 in Uncategorized


Tags: , , , , , , , , , , , , , ,

Bread Cover finished

here is another wedding present finished:

Image

Image

And then I put the backing on, and gave it some Lacey edging.

Image

Image

 
1 Comment

Posted by on August 8, 2012 in Uncategorized


Tags: , , , , , , ,